Healthcare Cybersecurity 101: How Small Clinics Can Safeguard Patient Records Without Breaking the Bank

Running a small clinic is hard enough without worrying about hackers, ransomware, or data breaches. Yet, healthcare is one of the most targeted sectors for cybercrime—not just big hospitals, but small practices too.
For a clinic with 5–20 staff, a serious cyber incident can mean:
- Days of downtime where you can’t access your Electronic Health Record (EHR).
- Cancelled appointments and lost revenue.
- Regulatory investigations (e.g., under HIPAA in the U.S. or local health data laws).
- Damage to patient trust that took years to build.
The good news: you don’t need a big IT department or huge budget to make your clinic much more secure. Most high‑impact protections are about clear rules, basic tools, and consistent habits—not fancy technology.
This guide walks you through practical, affordable steps you can start this month, in plain language.
1. Why Cybersecurity Matters for Small Clinics
1.1 Your Patient Data Is Valuable
Patient records (sometimes called Protected Health Information or PHI) contain:
- Full names, dates of birth, addresses.
- Medical history, diagnoses, medications.
- Insurance details, sometimes payment information.
Criminals can sell this information, use it for fraud, or hold it hostage with ransomware.
1.2 Legal, Financial, and Operational Risk
Depending on your country, you likely have legal obligations to protect patient data (e.g., HIPAA in the U.S., GDPR in the EU, PDPA or similar in many other regions). Failing to do so can lead to:
- Fines and legal costs.
- Mandatory breach notifications to patients and regulators.
- Contract issues with insurers and partners.
Operationally, a cyberattack can:
- Lock you out of your systems.
- Force you back to paper.
- Delay lab results, prescriptions, and referrals.
1.3 Small Clinics Are Not “Too Small to Target”
Attackers often use automated tools that scan the internet for any vulnerable system. They don’t care if you have 10 users or 10,000. But you do have an advantage:
- Fewer systems.
- Smaller staff.
- Ability to make decisions quickly.
With a focused plan, small clinics can reach a strong baseline of protection without breaking the bank.

2. Access Control: Making Sure the Right People See the Right Data
Access control means controlling who can access what, and under what conditions.
2.1 Key Concepts (In Plain Language)
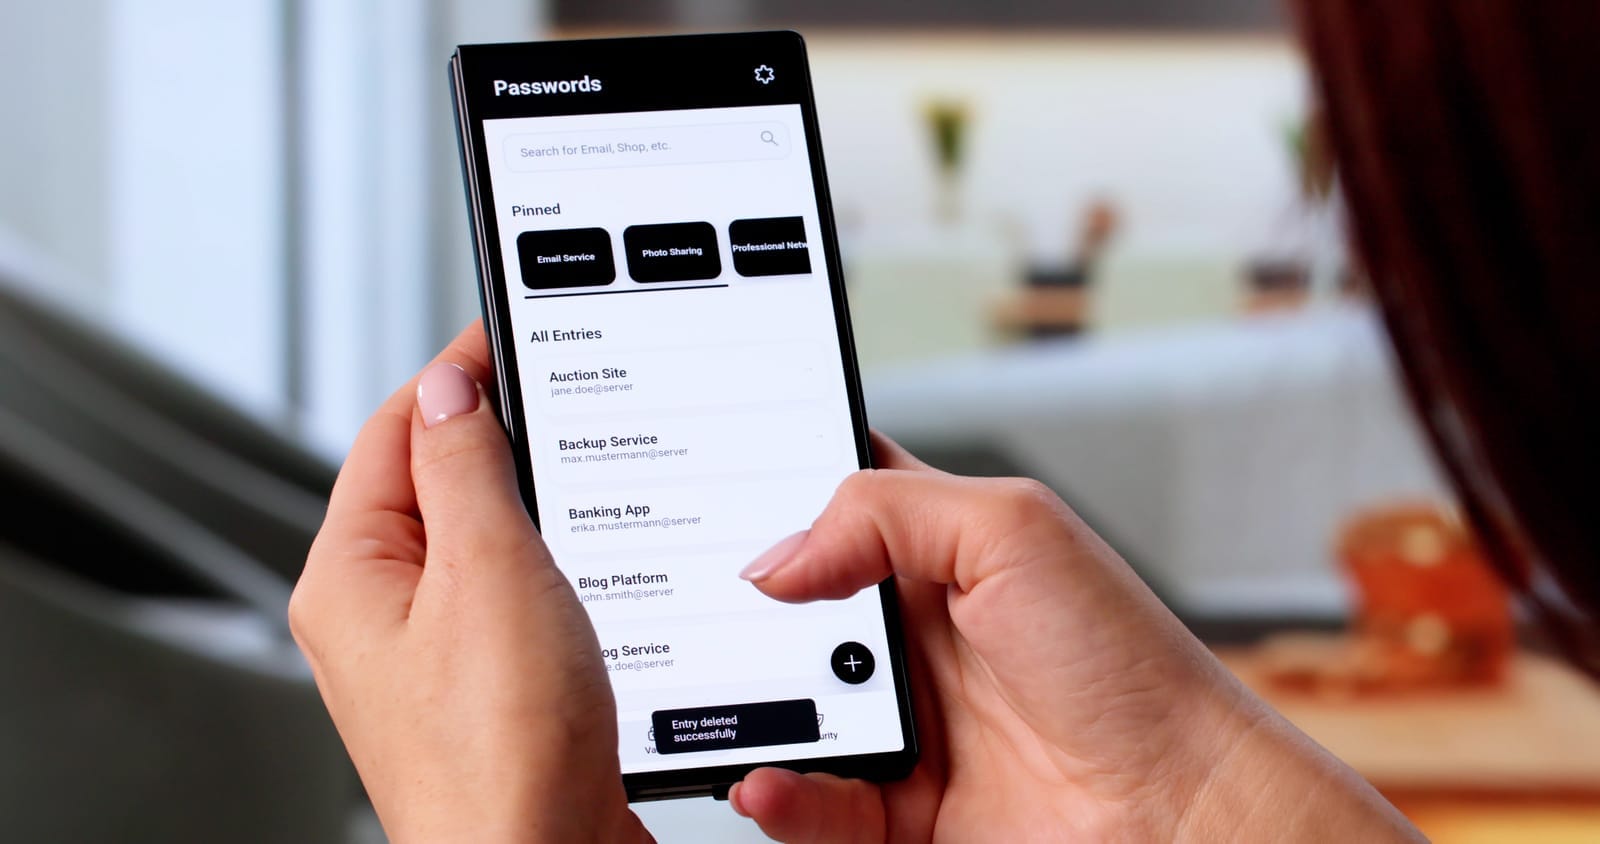
- Unique user accounts: Each staff member has their own login. No shared passwords.
- Strong passwords: Longer, hard-to-guess passwords or passphrases.
- Role-based access: People only see what they need for their job.
- Locking workstations: Computers auto-lock when unattended.
- Limiting admin rights: Only a few people can install software or change key settings.
2.2 Why It Matters in Healthcare
- Reduces risk from internal mistakes or misuse.
- Helps you know who did what (important for audits and investigations).
- Limits damage if one account is compromised.
2.3 Practical, Low-Cost Steps
1. Stop sharing logins
- Require each staff member to have their own EHR, email, and system accounts.
- Disable generic logins like “Nurse1” or “FrontDesk.”
- When someone leaves, disable their account the same day.
Effort: low; Time: a few hours; IT help: minimal (may need vendor for EHR setup).
2. Enforce strong passwords
- Use longer passphrases (e.g., “GreenCoffee!Clinic2024”) rather than short, complex codes.
- Avoid reusing clinic passwords on personal sites.
- Consider a password manager (secure digital “vault” that stores and autofills passwords).
Effort: low; Time: 1–2 hours to set rules + brief staff training.
3. Set role-based access
- In your EHR and file systems, give roles like “Physician,” “Nurse,” “Billing,” “Reception.”
- Reception doesn’t need access to clinical notes.
- Clean up old accounts and permissions at least annually.
Effort: medium; Time: a half-day to plan roles + vendor support.
4. Lock workstations automatically
- Set screens to lock after 5–10 minutes of inactivity.
- Train staff to lock screens manually when leaving (Windows: Windows + L; Mac: Control + Command + Q).
- Check that screens don’t face waiting rooms or public areas.
Effort: low; Time: 1–2 hours.
5. Limit admin rights
- Only 1–2 trusted accounts (or your IT provider) should be “administrators.”
- Staff should use standard, non-admin accounts daily.
- This reduces the chance that malware can install itself.
Effort: medium; Time: a few hours with IT help.
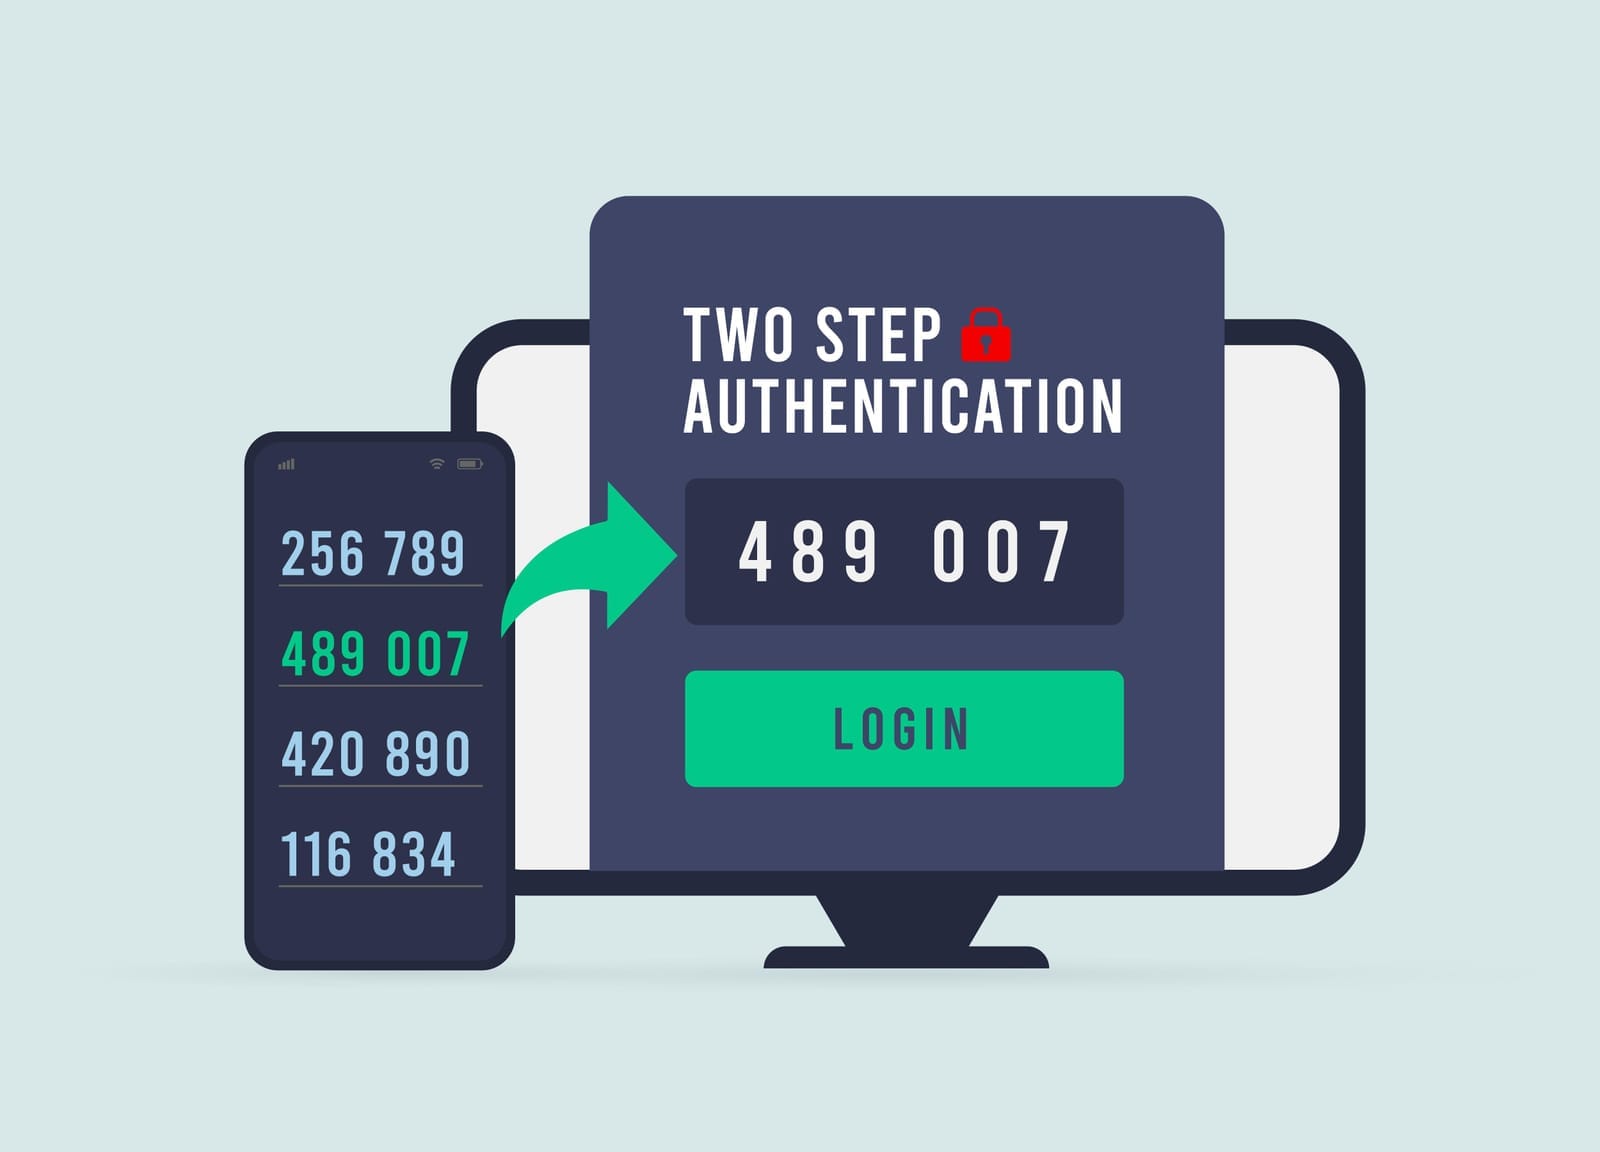
3. Multi-Factor Authentication (MFA): A Second Lock on the Door
Multi-factor authentication (MFA) means you need two or more proofs to log in, for example:
- Something you know: password.
- Something you have: phone or security key.
- Something you are: fingerprint or face recognition.
3.1 Why MFA Is Critical for Clinics
Most healthcare breaches start with stolen or guessed passwords. MFA makes stolen passwords much less useful to attackers.
3.2 Where to Use MFA First
Prioritize MFA for:
- EHR / practice management system (if supported).
- Email accounts, especially for providers and leadership.
- Remote access (remote desktop, VPN, cloud dashboards).
3.3 Low-Friction MFA Options
- Authenticator apps (e.g., code-generating apps on your phone): more secure than SMS.
- Push notifications: tap “Approve” on your phone.
- SMS codes: acceptable where better options aren’t available.
3.4 Practical Steps
1. Turn on MFA for email and cloud services
- Log into your email/admin portal.
- Enable MFA for all staff, starting with clinicians and managers.
- Provide a simple 1-page guide with screenshots.
Effort: low; Time: 1–2 hours plus brief staff onboarding; IT help: optional.
2. Ask your EHR vendor about MFA
- If it’s available, schedule a rollout:
- Pilot with 2–3 staff.
- Then roll out to everyone.
- Avoid turning it on for all staff without warning—communicate first.
Effort: medium; Time: half-day planning + training.
3. Require MFA for any remote access
- If staff can log in from home, MFA is non-negotiable.
- If your current remote setup can’t support MFA, plan to upgrade (see phased roadmap below).
Effort: medium; likely needs IT help.

4. Encryption: Protecting Data If Devices or Connections Are Compromised
Encryption means turning information into a code that can only be read with the right key or password.
- At rest: data stored on laptops, phones, servers, USBs.
- In transit: data moving over the internet (e.g., from your browser to a server).
4.1 Why Encryption Matters for Clinics
If a clinic laptop with unencrypted PHI is lost or stolen, it can be a reportable data breach. If encrypted and properly protected, you may avoid reporting obligations (depending on local law and your legal counsel).
4.2 Encrypting Devices (At Rest)
1. Laptops and desktops
- Windows: use BitLocker (built into many versions).
- Mac: use FileVault (built in).
- Set strong login passwords and ensure automatic lock.
Effort: medium (per device); Time: 30–60 minutes setup + encryption time; likely needs IT support to do this safely and document recovery keys.
2. Smartphones and tablets
- For work devices:
- Require a PIN or biometric unlock.
- Ensure “device encryption” is enabled (often automatic on modern phones).
- Turn on the ability to remotely wipe if lost.
Effort: low–medium; Time: a few minutes per device.
3. USB drives and external hard drives
- Avoid ordinary USB sticks for PHI.
- If you must use them, use encrypted USB drives or encrypt them with built-in tools.
- Keep a log of who uses them and where they are stored.
Effort: medium; low hardware cost; IT help recommended for setup.
4.3 Encryption in Transit
You likely already use some of this without realizing:
- HTTPS websites (padlock icon in the browser) encrypt traffic.
- Reputable patient portals and telehealth tools typically use encryption—confirm with your vendor.
Practical steps:
- Use your patient portal (see next section) instead of regular email for PHI.
- If remote staff access internal systems, use a VPN (Virtual Private Network)—an encrypted “tunnel” to your clinic network.
- Avoid public Wi‑Fi for accessing PHI unless using a trusted VPN.
Effort: low–medium for portals; medium–high for VPN (needs IT).

5. Secure Messaging and Communication
5.1 The Problem with Regular Email and Texting
Regular email and SMS texts:
- May travel unencrypted.
- Are often stored on personal devices outside your control.
- Are easily misaddressed (e.g., wrong “John Smith”).
This can create unnecessary exposure of PHI and compliance risk.
5.2 Safer Alternatives
1. Patient portals
- Most modern EHRs include secure messaging portals.
- Patients can log in to view results, ask questions, and send messages.
Implementation tips:
- Encourage staff to say, “For anything containing medical details, we’ll send it via your secure portal.”
- Include portal instructions in welcome packets and after-visit summaries.
Cost: usually included in EHR; Effort: low–medium to train staff and onboard patients.
2. Secure messaging platforms
- Use platforms designed for healthcare/regulated industries for staff-to-staff messaging.
- These typically provide encryption, audit logs, and admin control.
Cost: low–medium per user/month; Effort: medium (select tool, configure, train staff).
5.3 Policies on Texting with Patients and Staff
- Create a simple, written policy:
- When texting is allowed (e.g., “appointment reminder only”).
- What must not be sent via SMS (e.g., diagnosis, treatment details).
- What to do if PHI is sent to the wrong person.
Encourage staff to move conversations into the portal as soon as medical details arise:
“I’m going to continue this through your secure patient portal so we can keep your information private.”
Effort: low; Time: 1–2 hours to draft policy + staff briefing.

6. Backups & Recovery: Your Safety Net Against Ransomware and Accidents
Backups are copies of your data that you can restore if your main systems fail (due to hardware failure, mistakes, or attacks like ransomware).
6.1 Key Concepts
- Offline or immutable backups: backups that cannot be easily changed or deleted by an attacker.
- Backup frequency: how often backups run (e.g., hourly, daily).
- Testing restores: checking that you can actually restore data from backups.
6.2 Why Backups Are Critical for Clinics
Ransomware can encrypt all your files and demand payment. If you have reliable, recent backups that attackers can’t reach:
- You can often restore your systems without paying.
- Downtime is limited to the time needed to restore.
6.3 Practical, Budget-Friendly Steps
1. Identify what needs backing up
- EHR databases (check with your vendor; many cloud EHRs handle this).
- File shares with scanned documents, reports, and billing info.
- Imaging or local lab systems, if applicable.
Effort: low–medium; needs some IT/vendor discussion.
2. Set up automated backups
- For on-premise servers or local data:
- Use backup software to automatically back up to:
- A separate device on-site and
- A secure cloud backup location.
- Use backup software to automatically back up to:
- Aim for at least daily backups (more frequent for critical systems).
Effort: medium; Cost: low–medium monthly; IT help recommended.
3. Ensure offline or immutable copies
- At least one backup should be:
- Offline (e.g., external drive detached except during backup windows), or
- “Immutable” (cannot be changed for a set period).
Effort: medium; IT help needed to design and configure.
4. Test restores regularly
- At least 2–4 times per year:
- Restore a small set of files.
- Once per year, simulate a full system restore (as feasible).
- Document:
- How long it took.
- Any issues found.
Effort: medium; Time: a few hours per test; IT involvement: yes.
5. If you’re hit by ransomware
- Do not rush to pay the ransom.
- Disconnect infected systems from the network.
- Contact your IT provider, cyber insurance (if you have it), and legal/compliance advisors.
- Assess damage, then restore from clean backups.

7. Basic “Cyber Hygiene”: Everyday Habits That Reduce Risk
Think of this as digital handwashing and PPE for your clinic.
7.1 Keep Software Updated
- Enable automatic updates for:
- Operating systems (Windows, macOS, iOS, Android).
- Browsers.
- Security software.
- Schedule maintenance windows (e.g., monthly) where you check that updates are actually applied.
Effort: low–medium; IT help can simplify this with central tools like device monitoring & patch management Techease Company Profile.txt +1.
7.2 Use Anti-Malware/Endpoint Protection
- Install reputable antivirus/endpoint detection and response (EDR) on all clinic computers and servers.
- Ensure:
- Real-time protection is on.
- Scans run at least weekly.
Effort: low–medium; Cost: low per device/month; IT help useful to manage centrally Techease Company Profile.txt +1.
7.3 Phishing Awareness Training
Phishing is when attackers send fake emails or texts that look real to trick staff into clicking links, opening infected attachments, or sharing passwords.
Train staff to:
- Be cautious of unexpected attachments or links.
- Check sender addresses carefully.
- Be wary of “urgent” or “must act now” messages.
- Confirm unusual requests (especially about money or login details) by phone or separate channels.
Keep it simple:
- 20–30 minute training once or twice a year.
- Quick refreshers when you see new scams.
Effort: low; Cost: low; Can be done in-house or via simple online modulesTechease Company Profile.txt.

7.4 Safe Use of Wi‑Fi
- Have a separate guest Wi‑Fi network for patients and visitors.
- Protect clinic Wi‑Fi with a strong password and modern encryption settings (e.g., WPA2/WPA3).
- Avoid using the same password for years; rotate it at least annually.
- Do not run clinical systems on the same network segment as public/guest Wi‑Fi (IT can separate these).
Effort: medium; IT help recommended once, then low effort to maintain.
7.5 Keep a Device Inventory
Know what you have:
- Computers, laptops, tablets, phones used for work.
- Servers, network devices (routers, firewalls, access points).
- USB drives and external hard drives storing PHI.
Maintain a basic spreadsheet:
- Device type, location, user.
- Whether encryption and antivirus are enabled.
- Warranty/support status.
Effort: medium at first; low to maintain; very helpful during incidents or audits.

8. A Realistic 3‑Phase Implementation Plan
Below is a suggested roadmap for a 5–20 person clinic. Adjust based on what you already have in place.
Phase 1: Start This Month (High Impact, Low Cost)
Goal: Fix the most common weaknesses quickly.
Timeframe: 0–4 weeks
Cost: Mostly low
Who: Mix of in-house actions and light IT/vendor support
- Stop shared accounts; clean up accessEffort: low; IT/vendor support: minimal.
- Give each staff member unique logins for EHR and email.
- Disable accounts for former staff.
- Turn on automatic screen locking.
- Enable MFA for email and key cloud servicesEffort: low–medium; Cost: often included; IT help: optional.
- Turn on MFA for all staff email accounts.
- Pilot MFA with a small group, then roll out.
- Basic phishing and password trainingEffort: low; Cost: low; In-house or simple external resource.
- Short, practical training session (30–45 min).
- Create a 1-page “Do/Don’t” guide.
- Secure Wi‑Fi basicsEffort: medium; IT help: likely 1 visit or remote session.
- Ensure clinic Wi‑Fi has a strong password and modern encryption.
- Create/verify separate guest Wi‑Fi for patients.
- Start a device inventoryEffort: medium; Cost: none.
- List all computers, laptops, phones, tablets.
- Note who uses each and where PHI is stored.
Phase 2: Next 3–6 Months (Strengthen Core Protections)
Goal: Build a stronger, more resilient foundation.
Timeframe: 3–6 months
Cost: low–medium
Who: Likely requires structured help from an IT provider or your existing vendors.
- Roll out device encryptionEffort: medium; IT help: recommended.
- Enable BitLocker/FileVault on all clinic laptops and desktops.
- Ensure mobile devices used for work are encrypted and can be wiped remotely.
- Formalize access control and offboardingEffort: medium; Cost: low; May benefit from outside guidance Services & Pricing.txt +1.
- Define access by role (e.g., Reception vs. Nurse vs. Physician).
- Create a simple “New Staff / Departing Staff” checklist:
- Accounts to create/remove.
- Devices to issue/return.
- Permissions to grant/revoke.
- Improve backupsEffort: medium; Cost: low–medium (software + storage); IT provider needed Techease Company Profile.txt +1.
- Confirm what your EHR vendor backs up.
- For local data:
- Implement automated backups to separate storage and a secure cloud.
- Ensure at least one offline/immutable copy.
- Start using patient portals and secure messagingEffort: medium; Cost: usually low; Vendor guidance.
- Train staff to route PHI conversations to portals.
- Update patient materials to explain portal use.
- If needed, adopt a secure messaging tool for internal staff communication.
- Centralize updates and antivirusEffort: medium; Cost: low–medium per device/month; IT provider or managed service Techease Company Profile.txt +1.
- Use simple tools (or an IT service) to:
- Monitor devices.
- Push software updates.
- Manage antivirus/EDR across all machines.
- Use simple tools (or an IT service) to:

Phase 3: Within 12 Months (Mature, Proactive Security)
Goal: Move from “basic protection” to “managed, monitored, and improving.”
Timeframe: 6–12 months
Cost: medium (ongoing services)
Who: Combination of leadership, office manager, and external IT/security advisors.
- Formal policies and periodic reviewsEffort: medium; Cost: low–medium (if using outside help); compliance advisory services can help Techease Company Profile.txt +2.
- Document:
- Acceptable use (how staff should use clinic systems).
- Password and MFA requirements.
- Remote work rules.
- Incident response basics (who to call, first steps).
- Review annually or after any major incident.
- Document:
- Business continuity and disaster recovery planningEffort: medium–high; Time: multi-week project; IT + management involvement Services & Pricing.txt +1.
- Define:
- What you do if EHR is down for a day or more.
- How you operate during internet or power outages.
- Recovery time goals (e.g., “We must be back up within 24 hours”).
- Align backups and IT support to meet those goals.
- Define:
- Regular security training and simulated phishingEffort: ongoing low–medium; Cost: low–medium.
- Annual training for all staff, with refreshers.
- Optional: phishing simulations to see how staff respond (used for training, not punishment).
- Periodic security review or auditEffort: medium; Cost: medium; often annual or biannual Services & Pricing.txt +1.
- Engage a trusted IT/security partner to:
- Review your controls.
- Check for outdated systems or misconfigurations.
- Provide a prioritized action list.
- Engage a trusted IT/security partner to:
- Executive/owner oversightEffort: low; Cost: mostly time; can be supported by virtual CIO-style services Services & Pricing.txt +1.
- Set a short quarterly review meeting (30–60 minutes) to:
- Review incidents (if any).
- Check progress on your security roadmap.
- Adjust budget and priorities.
- Set a short quarterly review meeting (30–60 minutes) to:

9. Compliance and Reality Check
- No control offers 100% protection. The goal is to significantly reduce risk and be able to respond quickly when issues occur.
- Most regulations (HIPAA, GDPR, PDPA, etc.) expect:
- Reasonable technical and organizational measures.
- Staff training and documented policies.
- Incident response and breach notification procedures.
You don’t need to be perfect—but you do need to show that you are taking patient privacy seriously and improving over time.
For detailed legal obligations, consult a healthcare attorney or compliance specialist. Your IT provider can support the technical side (e.g., encryption, backups, monitoring), but cannot replace legal advice.

10. Action Checklist: What to Do Next
Here’s a simple starting checklist you can use in your clinic:
This Month
- Stop using shared logins; ensure unique accounts for all staff.
- Enable MFA for email and any cloud accounts that support it.
- Turn on automatic screen locking on all computers.
- Deliver a short, practical phishing and password training to staff.
- Verify clinic and guest Wi‑Fi are separate and password-protected.
Next 3–6 Months
- Encrypt all laptops, desktops, and work mobile devices.
- Confirm and improve backups, including at least one offline/immutable copy.
- Start using patient portals and/or secure messaging for PHI.
- Create a simple staff onboarding/offboarding checklist for IT access.
- Set up centralized management for updates and antivirus/EDR.
Within 12 Months
- Document key cybersecurity policies (passwords, texting, remote access, incident response).
- Develop or refine your business continuity and disaster recovery plan.
- Schedule regular security reviews with your IT provider.
- Implement annual security awareness training and refreshers.
You don’t need to become a cybersecurity expert to protect your clinic. By following a phased, practical plan and partnering with the right IT support where needed, you can significantly reduce your risk, stay on the right side of regulations, and, most importantly, maintain your patients’ trust.